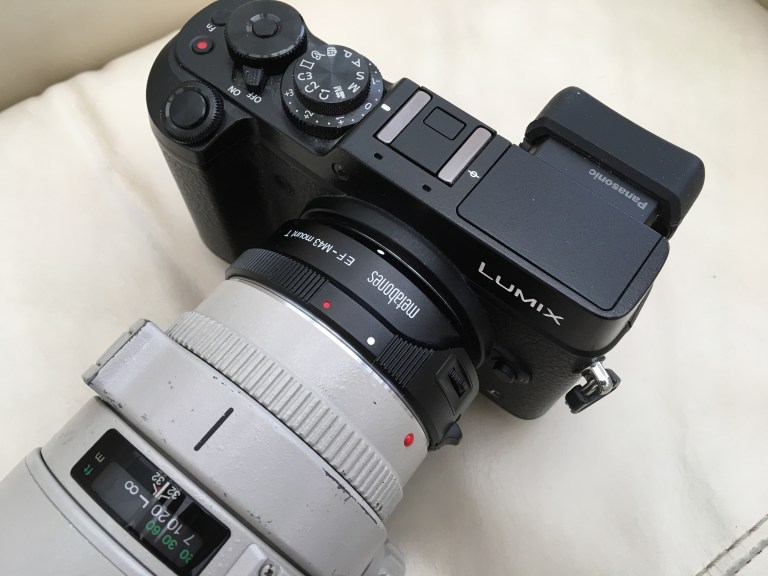
I bought a Metabones Smart Adapter (T) for my GX8 a while back to see how my Canon lenses might work. I had used a Nikon version before, but that wasn’t a smart version so I had only manual focus with the Nikon lenses. I hadn’t really had much time to use or test the Canon adapter up until now so thought that I would try a 300mm and see how it worked.
I photographed some birds in my garden and below is a shot of a blackbird. I found focussing to be very quick – pretty much as I would expect on a Canon body. I used the single point focus on the GX8 as to me that always seems more accurate.
The shot below was handheld – with one hand resting on a support for balance. So the camera was moving around a bit. Shutter speed 1/640 and F5. Considering birds move about very quickly the AF kept up with the bird really well. There were a few out of focus shots but that was more down to me. Also on this camera the lens is equivalent to a 600mm. The bird was about 5 metres away, so very shallow depth of field.
This is from about the first couple of dozen shots ever shot with the lens/adapter combination so I’m still getting used to it. But from the first few images with this lens I would have no problem using it with the GX8. I get a 600mm equivalent without the weight and cost! I like using the GX8 when I’m just out and about shooting stock images as it’s preferable to carrying the extra weight of Canon bodies. A GX8, couple of M4/3 lenses and perhaps a Canon 300mm makes a pretty lightweight kit which will cover almost anything.
GX8 with Metabones M4/3 to Canon EF Smart T Adapter 1/640 sec at F5, ISO 800
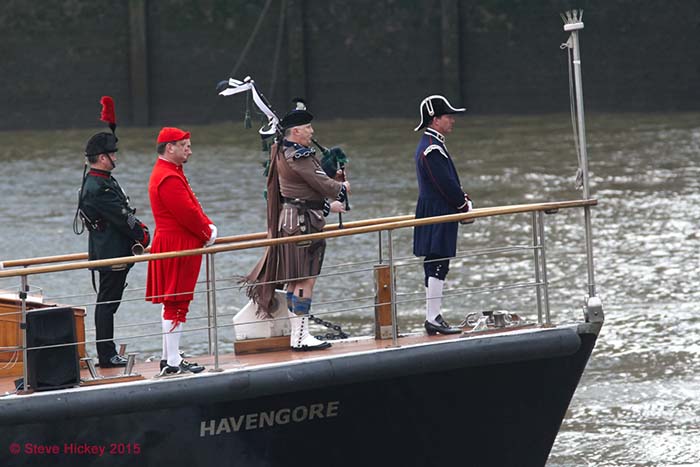
The ceremonial guard at the front of the Havengore.
Back in the city today and I managed to get down to the river to get a few shots of the start of the ceremonial event for the anniversary of Winston Churchill’s funeral. I remember watching the funeral on TV when I was young and that kind of thing always sticks in the memory so it was interesting to see a recreation of the event.
The boat which originally carried his coffin, 50 years ago today, retraced the route along the Thames – so I thought that I would go and get a few shots for stock. I know the area really well and had a place in mind to shoot from but as I couldn’t get down there until 45 minutes before the event I thought maybe I might have a struggle with crowds – but only a few tourists were around. Even when the boat passed the crowd was very light and also not many photographers were near my position – always a good thing! Weather was good, bit of hazy sun and not too cold. The boat moved pretty quickly, much quicker than I expected, and from my position it was all over in a few minutes. I had quite a few shots in the bag so as the boat moved on I packed up and headed for the station.
The fact that there weren’t big crowds did kind of make me wonder about the relevance of the anniversary for the average person on the street. There’s been a lot of media focus on the anniversary, a lot of stuff on TV, and for those closely involved it’s obviously an emotional event, but as for the general public – many don’t seem to take much notice. I found that there’s a few commemorative things going on including an exhibition at the Science Museum which runs until 2016.
There’s also a General Election coming up in a few months – but whatever any of us might think of Churchill, it would be a shame if the anniversary of the death of a major world statesman were to be hijacked for political reasons. That wouldn’t happen would it?
The photograph above taken with a Canon 1D3 with 300mm f4 and 1.4x converter.
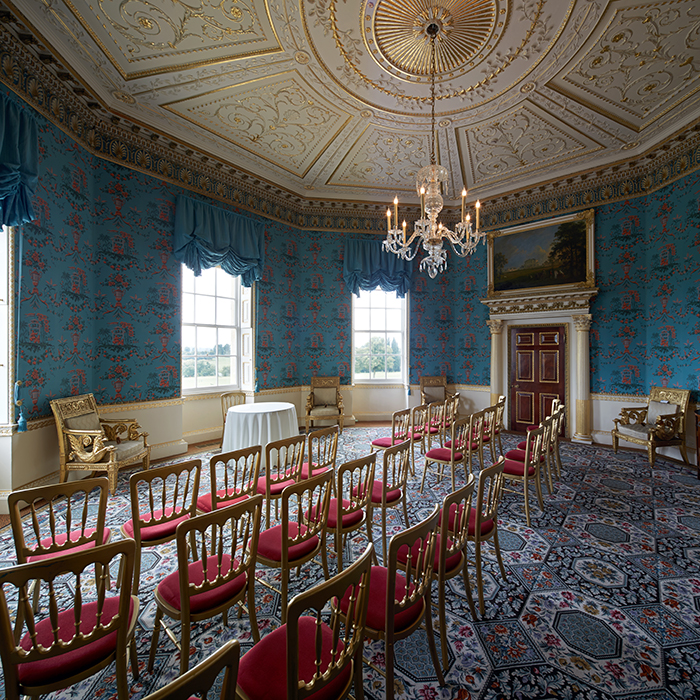
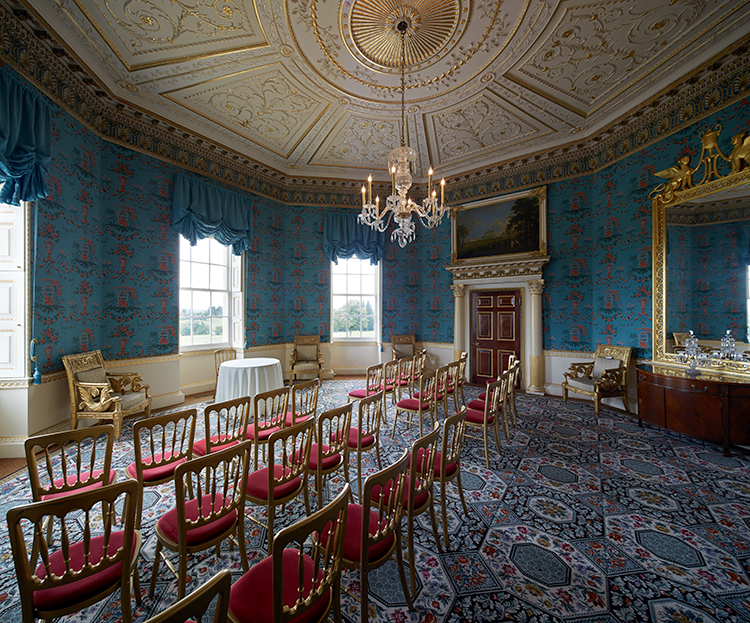
Recently I was asked to do some photography at Danson House. The photography was for a new brochure showing the wedding set ups at both Danson House and Hall Place, both located in the London Borough of Bexley. I took along a Canon 17mm TSE together with a little rig I sometimes use to get very wide shots.
The photograph above is of The Salon, an octagonal shaped room in the house. The image is composed of three separate images which are then just layered together, it’s not stitching as there’s no special software involved.
This is a very tight space. I was literally standing against a wall ( not leaning on it! ) in between a very expensive chair and a probably more expensive cabinet. The tripod legs about a centimetre away from each!
Over the years I have used various cameras to get super wide shots, the Hasselblad SWC of course and 75mm lenses on 5×4 cameras. The digital full frame camera and shift lenses have in recent years made it possible to achieve the same kind of wide angle photographs that I was used to gettting on film.
The main issue is to keep the lens in exactly the same spot (relative to the scene) for all three images, this is done by effectively moving the camera around behind the lens. There are various rigs available to do this, but they can be quite expensive, so a couple of years ago I looked around for an economical alternative. I already had the Manfrotto umbrella attachment for a light stand and an old Metz 45 flash bracket so I just needed something to slide this around. I found the Manfrotto 454 micro positioning plate which was just what I was looking for. Cost for the Manfrotto 454 is around £75. I put these together so that I could mount the camera in a vertical position and then slide the whole thing very precisely sideways. It takes some time to ensure that everything is vertical – a bit fiddly but effective.
The rig with Canon 5D3 and 17mm TSE
The shooting method is as follows;
1/ Set the lens so that it shifts from side to side across the vertical plane, then centre the shift.
2/ Set the Manfrotto slider to a given point which works for you, I usually start with the marker at 20 or 30 on the scale. Ensuring that the camera is positioned so that it is directly above the tripod head.
3/ Take the first shot ( centre image)
4/ Move the slider 10 mm to the left (markings are 1mm) then move the lens shift to the right 10mm. Take second shot.
5/ From this move move the Manfrotto slider back to the centre point and then another 10mm to the right, move the lens shift so that it now goes beyond the centre position and 10mm to the left.
6/ This now means that I have three images each with a slightly different view but with the lens in pretty much exactly the same place in relation to the scene.
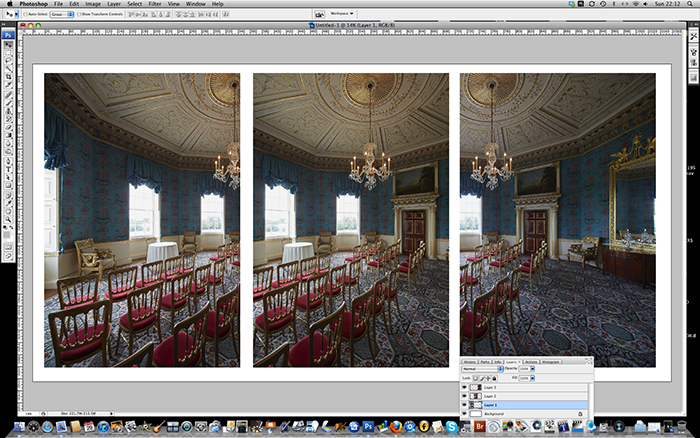
All that needs doing now is to align each of the images in Photoshop using layers. It’s feasible to do this in just two shots but I like to use the eraser tool to blur the joins of each image and having three shots gives me more room to play with on some shots. Also it’s safer to do three if you want to push the lens shift to 12mm, although I find it easier and quicker just to go for the 10mm markers most of the time.
The images usually line up exactly if I take time to make sure everything is straight and vertical, so layering them together is simple. The image on the left is slightly off in this shot. I have guessed roughly 10 pixels, but it’s only on the vertical axis and the side to side matches perfectly. I must have nudged the camera slightly on that one, or more likely I forgot to lock the Manfrotto plate on that exposure and this made a slight difference in how the camera was positioned.
You can see from the centre image on the Photoshop screen grab that you end up with a much wider image than just doing the one shot. The shot a the top of the page is cropped square which I think works well, very similar to how it might look on a SWC – possibly even wider. The full uncropped shot is below and works out at almost exactly a 5×4 ratio with a size of 113.5Mb.


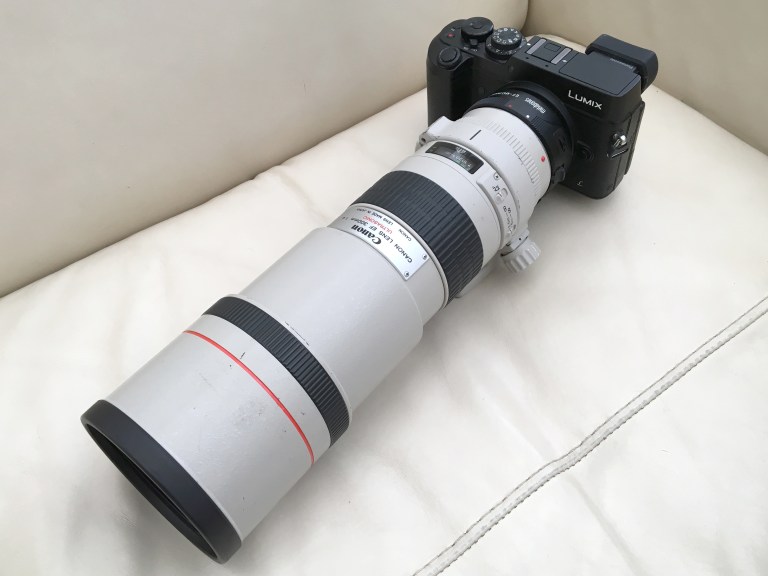 I bought a Metabones Smart Adapter (T) for my GX8 a while back to see how my Canon lenses might work. I had used a Nikon version before, but that wasn’t a smart version so I had only manual focus with the Nikon lenses. I hadn’t really had much time to use or test the Canon adapter up until now so thought that I would try a 300mm and see how it worked.
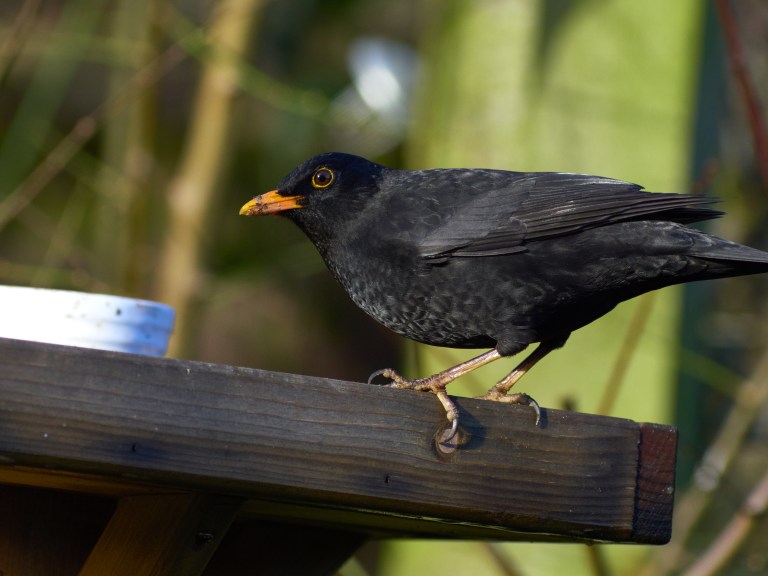
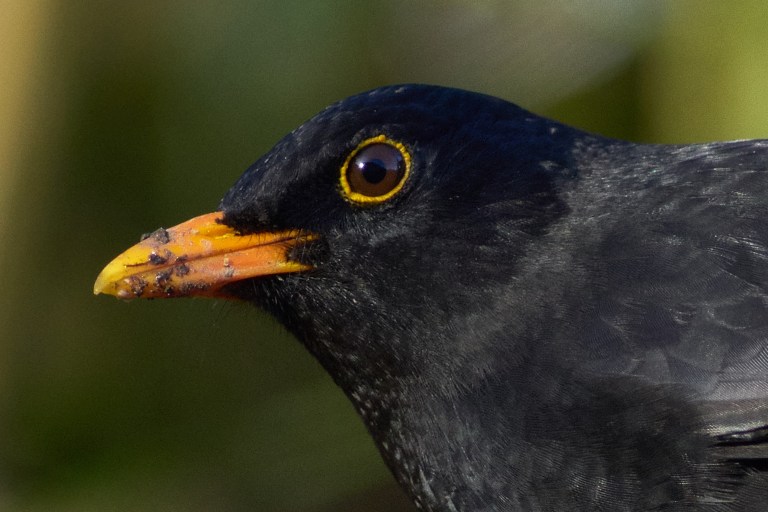 Image at approximately 100%