Art, I believe, can only be fully appreciated ‘in the flesh’ so to speak. Music and theatre, for instance, are best seen and heard live, not on some digital medium. Paintings, sculptures, even original photographic prints elicit a more emotional response when seen in reality. So it goes for all art forms, and Vivienne Westwood’s creations are no different.
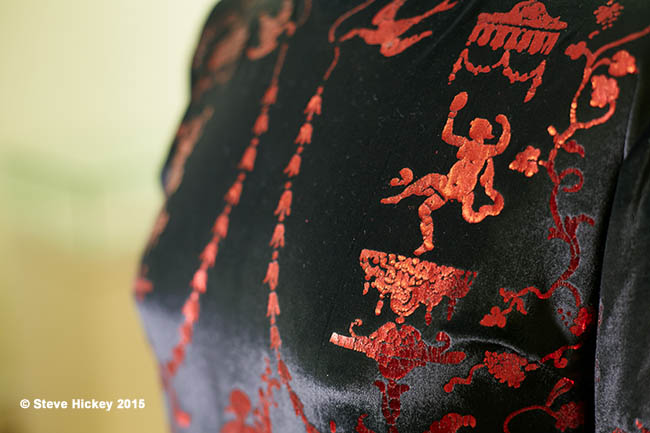
Dress detail
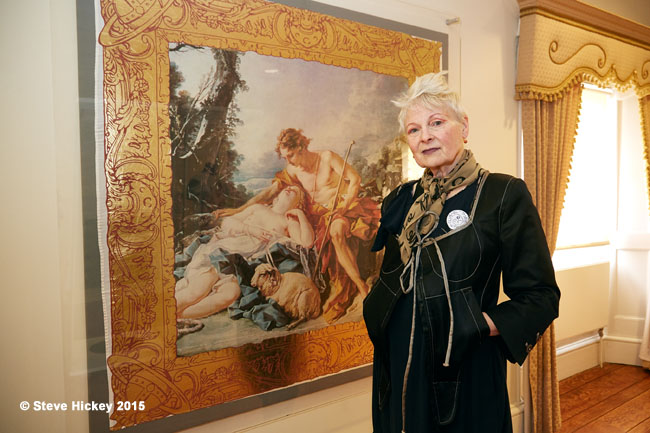
Vivienne Westwood: Cut from the past, covers her work from the punk years through to later pieces influenced by Vivienne’s love for 18th century art. Should these clothes be revered, referred to as ‘art’, just because they are placed in glass cabinets? Maybe, maybe not, but when I saw the exhibition I felt the same kind of response I have when seeing other artworks. Difficult to describe, so I won’t try, it’s only something that you get by being there. Of course it could be that the exhibition brought back memories of when I was younger. I even went to Vivienne’s Worlds End shop in the early 80’s to photograph Philip Sallon; I should have bought a few things from the shop when I was there and hung on to them! If you have any interest in fashion then this is an exhibition that should not be missed.
Dame Vivienne went to see the exhibition for herself last week. Afterwards she did a Q&A session following a talk given by Ian Kelly, who is the co-author of her biography.
The exhibition at Danson House continues until 31st October 2015.
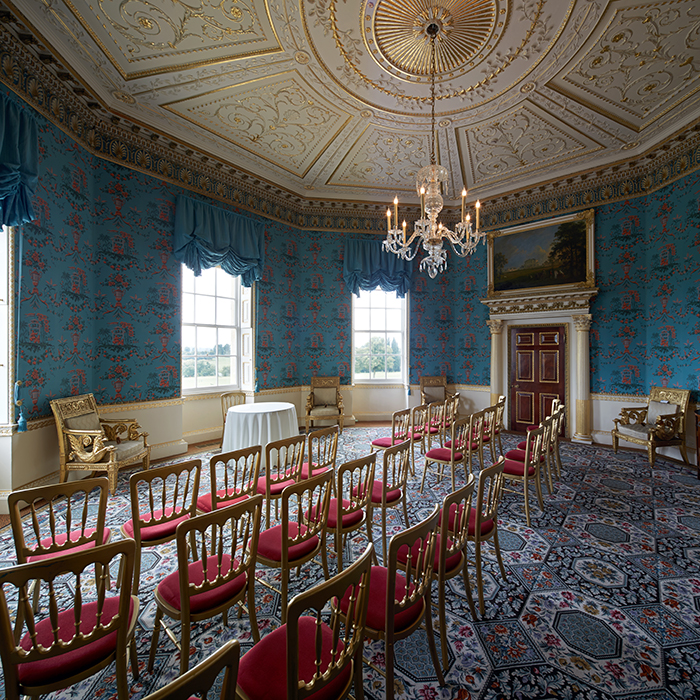
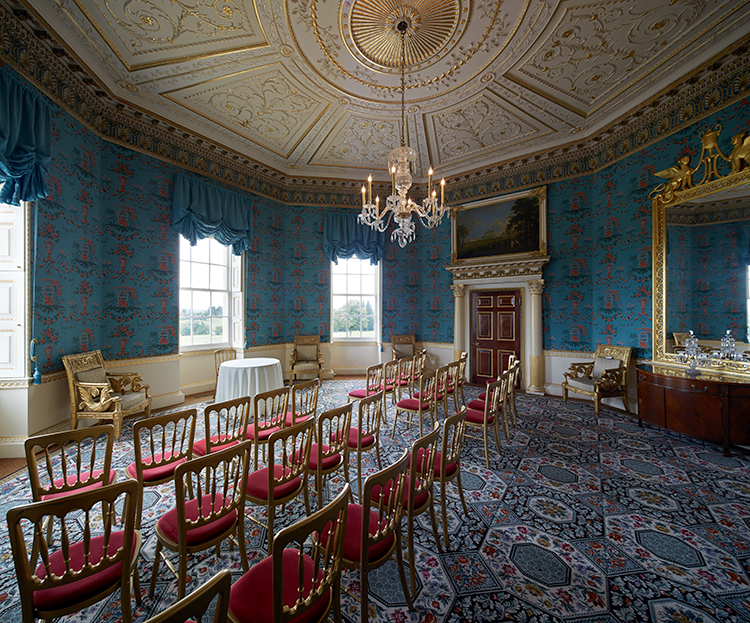
Recently I was asked to do some photography at Danson House. The photography was for a new brochure showing the wedding set ups at both Danson House and Hall Place, both located in the London Borough of Bexley. I took along a Canon 17mm TSE together with a little rig I sometimes use to get very wide shots.
The photograph above is of The Salon, an octagonal shaped room in the house. The image is composed of three separate images which are then just layered together, it’s not stitching as there’s no special software involved.
This is a very tight space. I was literally standing against a wall ( not leaning on it! ) in between a very expensive chair and a probably more expensive cabinet. The tripod legs about a centimetre away from each!
Over the years I have used various cameras to get super wide shots, the Hasselblad SWC of course and 75mm lenses on 5×4 cameras. The digital full frame camera and shift lenses have in recent years made it possible to achieve the same kind of wide angle photographs that I was used to gettting on film.
The main issue is to keep the lens in exactly the same spot (relative to the scene) for all three images, this is done by effectively moving the camera around behind the lens. There are various rigs available to do this, but they can be quite expensive, so a couple of years ago I looked around for an economical alternative. I already had the Manfrotto umbrella attachment for a light stand and an old Metz 45 flash bracket so I just needed something to slide this around. I found the Manfrotto 454 micro positioning plate which was just what I was looking for. Cost for the Manfrotto 454 is around £75. I put these together so that I could mount the camera in a vertical position and then slide the whole thing very precisely sideways. It takes some time to ensure that everything is vertical – a bit fiddly but effective.
The rig with Canon 5D3 and 17mm TSE
The shooting method is as follows;
1/ Set the lens so that it shifts from side to side across the vertical plane, then centre the shift.
2/ Set the Manfrotto slider to a given point which works for you, I usually start with the marker at 20 or 30 on the scale. Ensuring that the camera is positioned so that it is directly above the tripod head.
3/ Take the first shot ( centre image)
4/ Move the slider 10 mm to the left (markings are 1mm) then move the lens shift to the right 10mm. Take second shot.
5/ From this move move the Manfrotto slider back to the centre point and then another 10mm to the right, move the lens shift so that it now goes beyond the centre position and 10mm to the left.
6/ This now means that I have three images each with a slightly different view but with the lens in pretty much exactly the same place in relation to the scene.
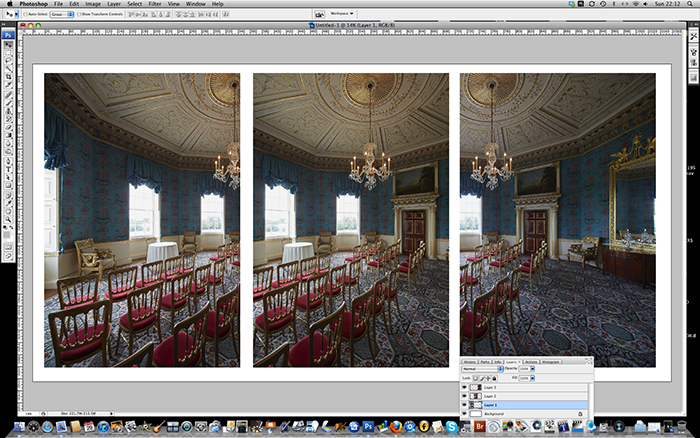
All that needs doing now is to align each of the images in Photoshop using layers. It’s feasible to do this in just two shots but I like to use the eraser tool to blur the joins of each image and having three shots gives me more room to play with on some shots. Also it’s safer to do three if you want to push the lens shift to 12mm, although I find it easier and quicker just to go for the 10mm markers most of the time.
The images usually line up exactly if I take time to make sure everything is straight and vertical, so layering them together is simple. The image on the left is slightly off in this shot. I have guessed roughly 10 pixels, but it’s only on the vertical axis and the side to side matches perfectly. I must have nudged the camera slightly on that one, or more likely I forgot to lock the Manfrotto plate on that exposure and this made a slight difference in how the camera was positioned.
You can see from the centre image on the Photoshop screen grab that you end up with a much wider image than just doing the one shot. The shot a the top of the page is cropped square which I think works well, very similar to how it might look on a SWC – possibly even wider. The full uncropped shot is below and works out at almost exactly a 5×4 ratio with a size of 113.5Mb.